
Love's Express Billing 'Account Set Up'
The Love's Express Program provides fleets with consistent and competitive pricing and no transaction fees, meaning your company will save money. Our reporting system allows you to maximize efficiency and minimize cost. The below step-by-step process guides you through the onboarding process to get your fleet account set up and ready. Our platform, powered by QuikQ, allows your drivers flexibility on the road and efficient solutions.
To modify existing purchase policies or general account maintenance, please contact Client Management at 1-866-213-5536 or ClientManagement@loves.com.
QuikQ Portal Login
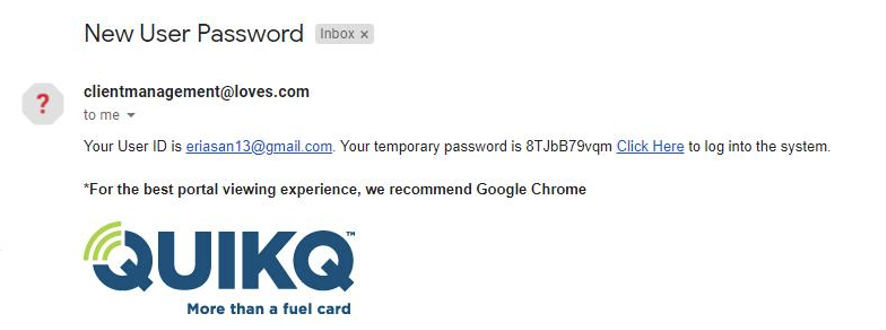
Here is an example of the registration email you should have received.
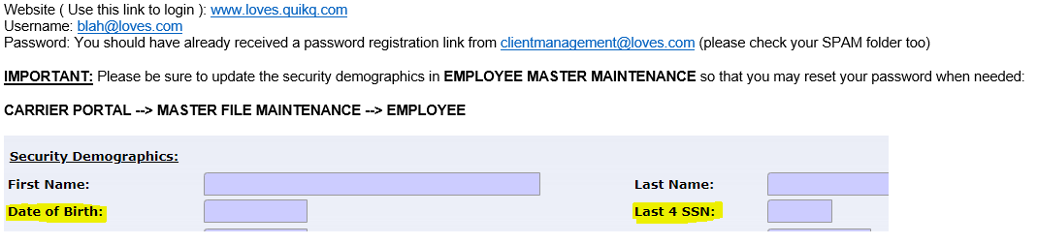
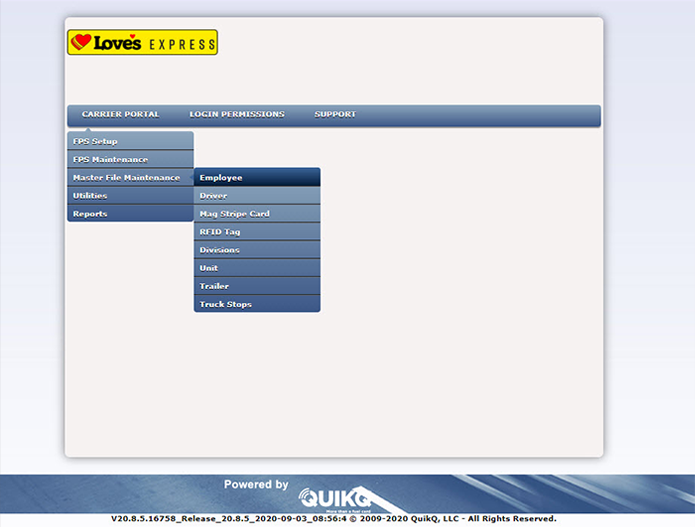
You will first need to login to the QuikQ Portal to begin setting up your account. Be sure to update the security demographics so that you may reset your password when needed. To do this, under the Carrier Portal dropdown, select Master File Maintenance and then Employee.
Fuel Card Management
ACTIVATE / INACTIVATE FUEL CARDS OR RFID TAGS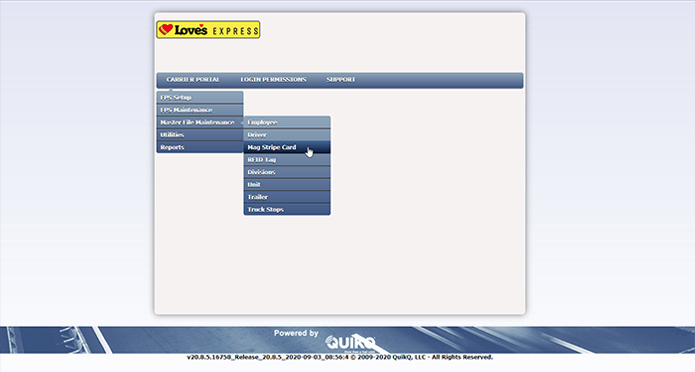
To activate or inactivate a fuel card, select Master File Maintenance under the CARRIER PORTAL dropdown. Then select Mag Stripe Card.
 Select the fuel card you want to activate or inactivate and the desired status for that card.
Depending on how you want to assign the card, click Driver or Unit under the Card Typedropdown. If the card will stay with the driver, select Driver, if it will stay in the unit, select unit. Then put either the driver ID or the unit number in the Association box. You many also click the Look Up button and select the driver ID or unit. Once you have entered all the information, click Save.
 If you are activating RFID tags, select RFID Tag under Master File Maintenance. Also, for easy RFID tag installation instructions, click here.
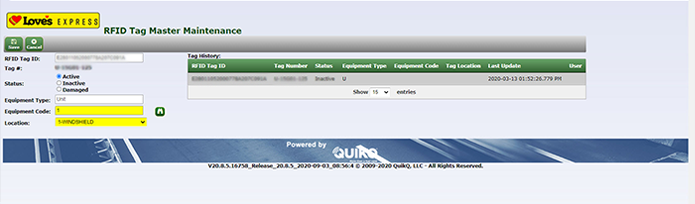 Select the tag you want to activate or inactivate and the desired status for that tag.
If you are activating an RFID tag, type in the unit number you want to assign it to in the Equipment Code box. You can also click the Look Up button and select the unit number or trailer number. When all information has been entered, click Save.
ADD / DELETE DRIVERS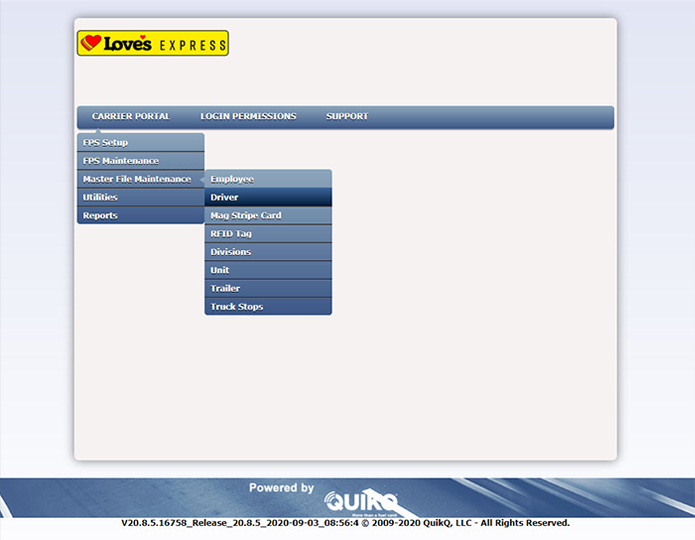
To add or delete a driver, select Driver under Master File Maintenance.
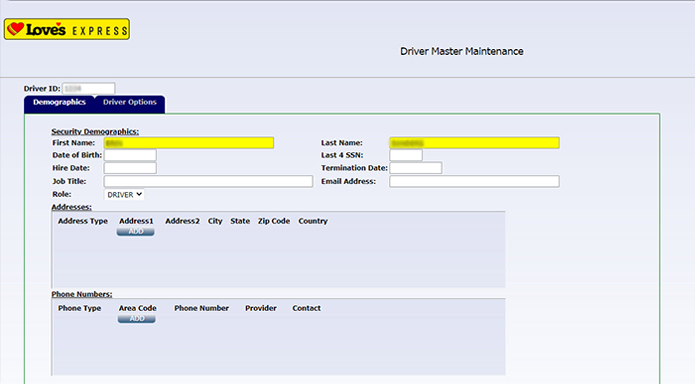
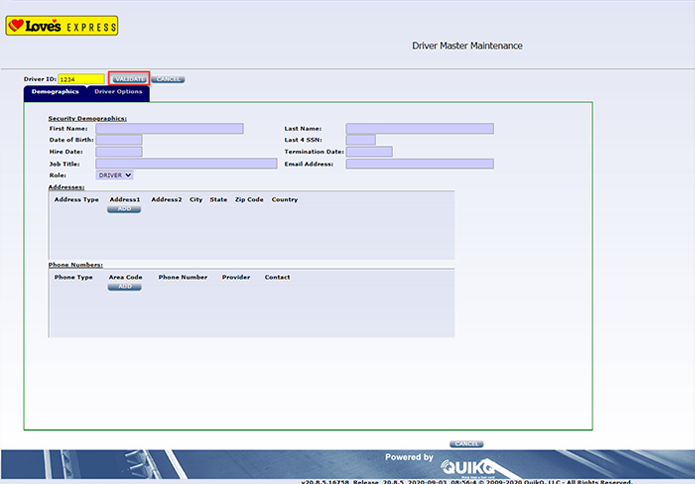 To add a driver, click Add at the bottom of the page and then enter the driver ID number. You will then select VALIDATE. The information required is highlighted in yellow. Fill in those fields and click Save.
If you are deleting a driver, select the driver ID you want to delete and then click DELETE at the bottom of the page.
 ADD / DELETE UNIT
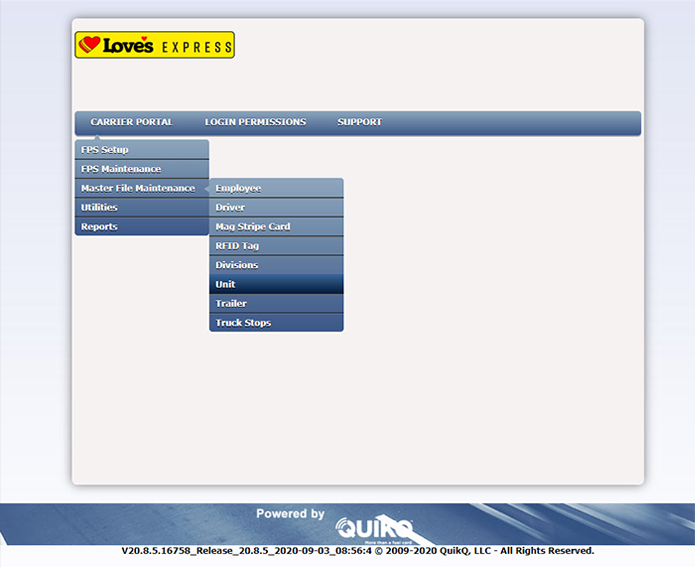
If you are adding or deleting a unit, select Unit under Master File Maintenance.
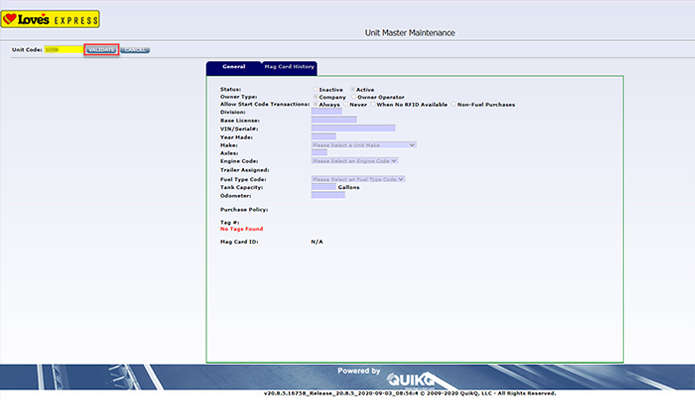 To add a unit, click Add at the bottom of the page and then enter the unit number. You will then select VALIDATE. The fields highlighted white are optional to fill in. After the unit number is validated, click Save.
If you are deleting a unit, select the unit number you want to delete and then click DELETE at the bottom of the page.
ADD / DELETE TRAILERS
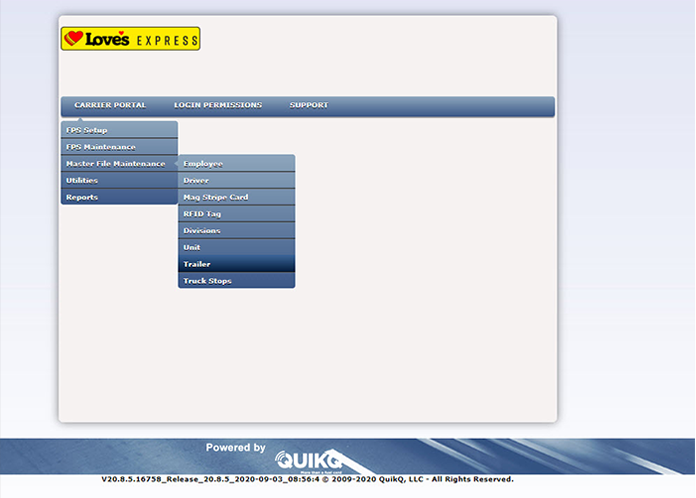 To add or delete a trailer, select Trailer under Master File Maintenance.
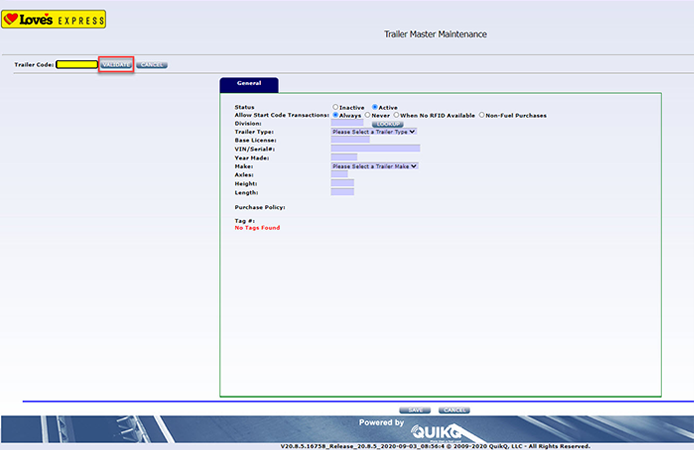 To add a trailer, click ADD at the bottom of the page and then enter the trailer number. You will then select VALIDATE. The fields highlighted white are optional to fill in. After the trailer number is validated, click Save.
If you are deleting a trailer, select the trailer number you want to delete and then click Delete at the bottom of the page.
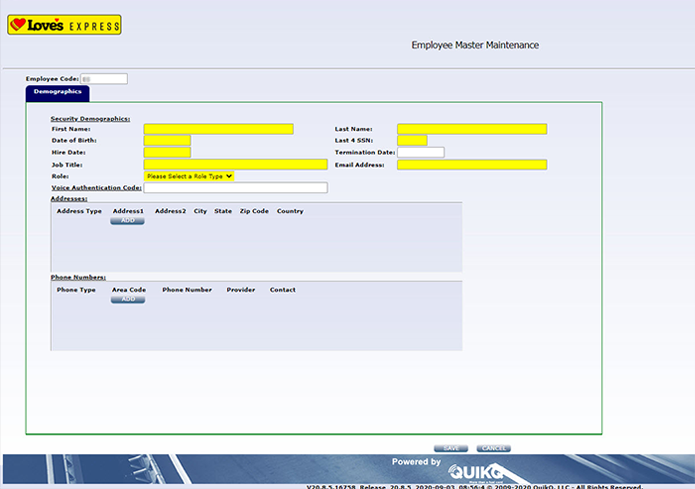
 ADD / DELETE EMPLOYEES
To add or delete employees, select Employee under Master File Maintenance.
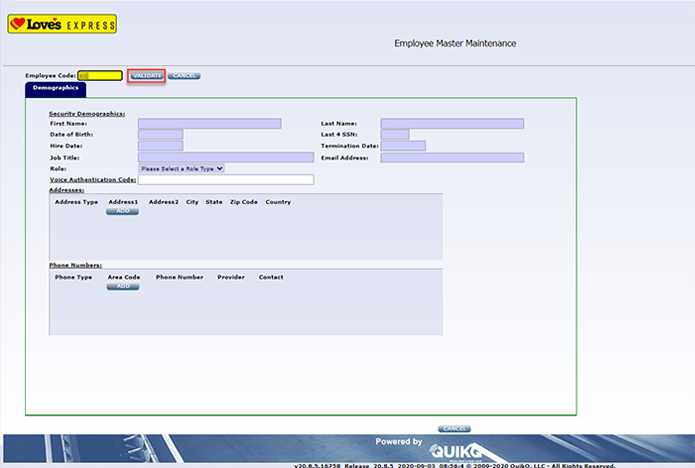 To add an employee, click Add at the bottom of the page and then enter the employee ID which is the first and last initial of their name. You will then select VALIDATE. The information required is highlighted in yellow. Fill in those fields and click Save.
If you are deleting an employee, select the employee ID you want to delete and then click DELETE at the bottom of the page.
Reporting/Transaction Management
![]() To run reports or look up transactions, first select Reports under the Carrier Portal dropdown. Then select Transaction Report.
To run reports or look up transactions, first select Reports under the Carrier Portal dropdown. Then select Transaction Report.
![]() Choose the desired date range and click Apply.
Choose the desired date range and click Apply.
![]() Select the Export button at the top right and choose desired file type.
Select the Export button at the top right and choose desired file type.
Real Time Transactions/Errors
![]() To view real time transactions or errors, under the Carrier Portal dropdown, select Utilities, then Support Maintenance, and lastly Transaction Support. Then Choose the desired date range and click Go.
To view real time transactions or errors, under the Carrier Portal dropdown, select Utilities, then Support Maintenance, and lastly Transaction Support. Then Choose the desired date range and click Go.
![]() If the transaction stage is highlighted green, the transaction is complete.
If the transaction stage is highlighted green, the transaction is complete.
If the transaction stage is highlighted yellow, the transaction may be in process or an error has occurred.
If the transaction stage is highlighted red, an error has occurred.
You can also click on any of these transactions to see more information.
Credit
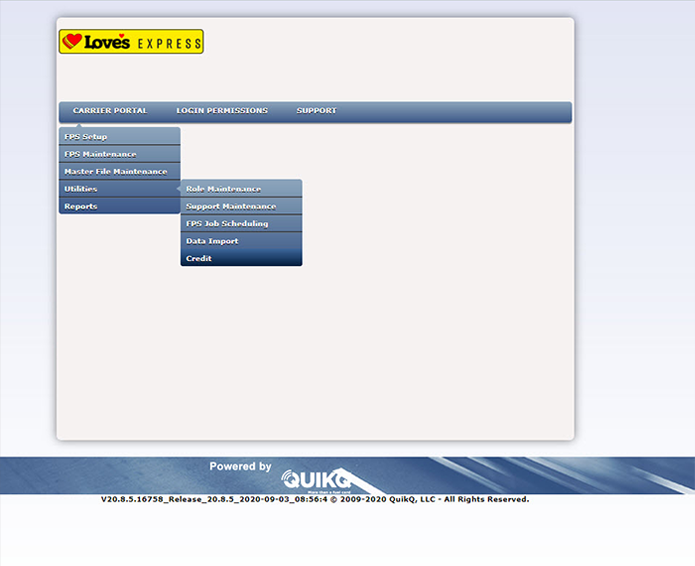 To view your available balance, under the Carrier Portal dropdown, select Utilities. Then select Credit.
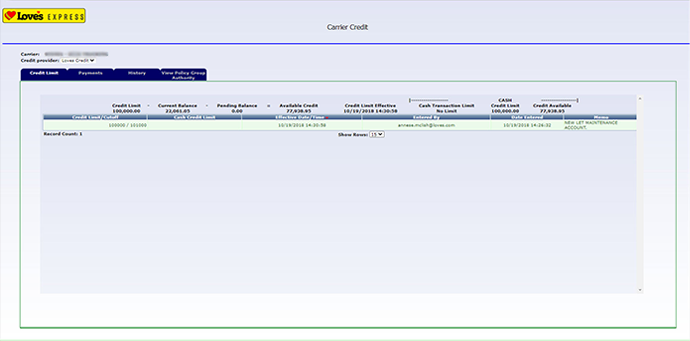 Under the Credit Limit tab, you can see your available credit.
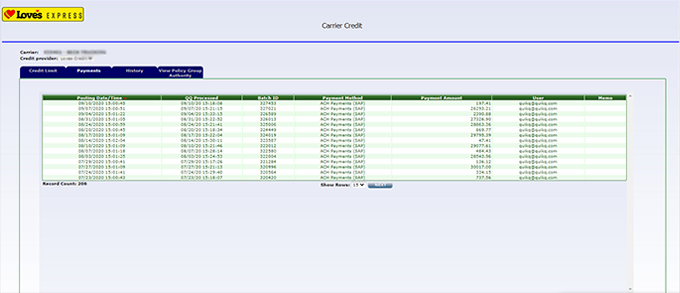 Under the Payments tab, you can see your payments in real time.
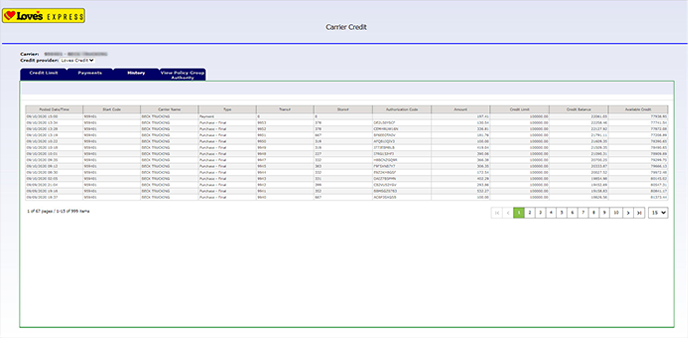 Under the History tab, you can see your payments and purchases.
Cardless Fueling Prompts
To view the steps for Cardless Fueling Prompts with RFID, please click here.
To view the steps for Cardless Fueling Prompts with Start Code, please click here.